Pages

Sunday, January 31, 2016

Darth Vader chest box finished

Introduction


The last couple of weeks I wrote about the second iteration of the Darth Vader chest box that I was making. Now that it is completely finished I'll here a summery of the project with the main properties of the box, a YouTube video of the chest box in action, schematics and links to all the blog posts about this project.

Darth Vader chest box properties


  • enclosure laser cut plywood (6mm)
  • easy control with four push buttons
  • DIY voice changer circuit with Holtek HT8950A
  • LM386 amplifier
  • build-in speaker
  • audio-in (3.5mm)


Finishing the job


When I started the Darth Vader chest box early december 2015 I didn't expect it would take me almost two months. Finally this week I finished it and I'm happy to say that it works great. For a couple of weeks it was almost finished but there always seemed to be some work to be done. A major problem was that I couldn't get the 3D printed container for the audio-jack right. I tried it several times at my local fablab but it just didn't fit. Finally I ordered the container from 3D Hubs and it had a perfect fit.

Audio-jack container (right) and volume knob (left). The blue parts were printed by me while the black parts were ordered through 3D Hubs. the X,Y-dimensions of the blue parts were off probably due to overextruding. The black parts were fine.

Next I made all the external connections to the perfboard, always a delicate job. I mounted the perfboard and all other components to the laser cut plywood parts.

All electrical components(buttons, perfboard, battery compartment, audio-jack, on/off switch)  fitted to the plywood parts. The speaker is fitted to the front panel of the chest box.
Finallly I glued all laser cut parts together with regular wood glue except for the front panel. When the batteries need replacement or some other kind of problem occurs I still have access to the inside of the chest box.

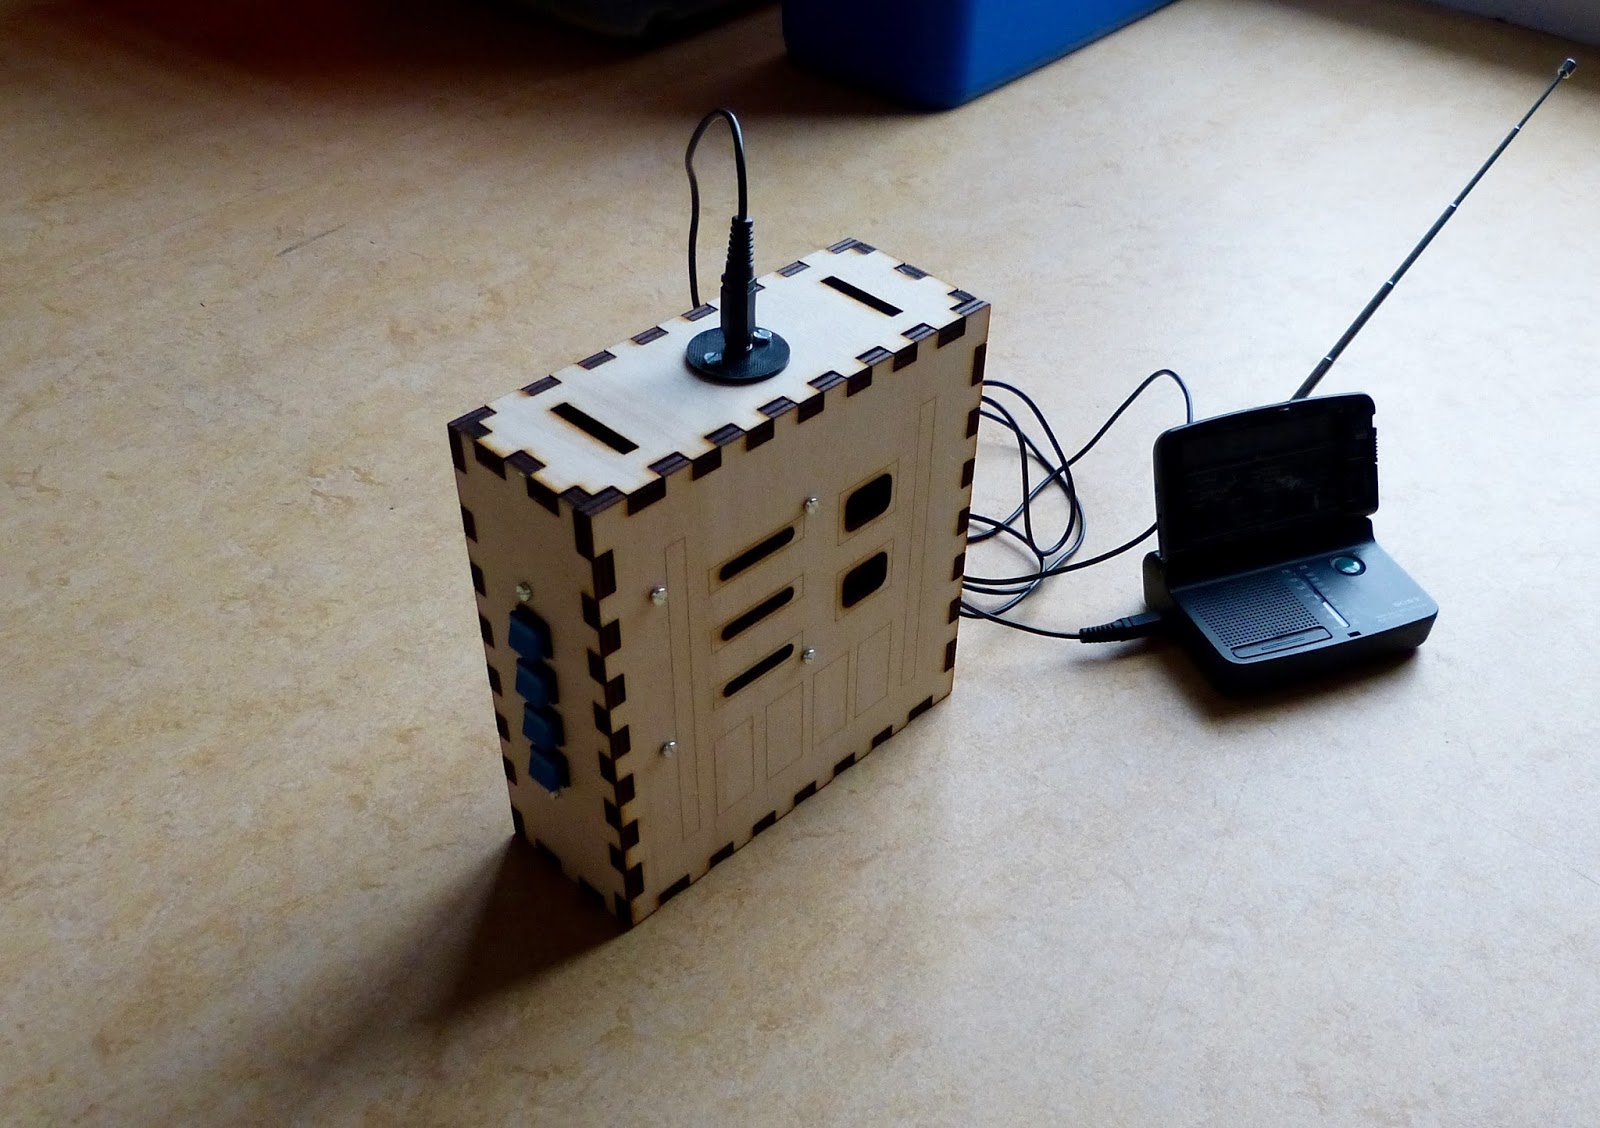
Chest box with FM radio connected to audio-in.

Finished chest box with laser cut parts glued to the front of the box.
Schematics of the Darth Vader chest box.

As a last step I wrote an instructable of the chest box providing anyone interested with the schematics, files for the laser cutter and 3D parts. In the mean time here are the links to the other blog posts on this chest box:
http://eribuijs.blogspot.nl/2015/12/darth-vader-voice-changer-20-ht8950a.html
http://eribuijs.blogspot.nl/2015/12/darth-vader-voice-changer-20-creating.html
http://eribuijs.blogspot.nl/2015/12/homemade-darth-vader-voice-changer-20.html
http://eribuijs.blogspot.nl/2016/01/designing-parts-for-darth-vader-chest.html
http://eribuijs.blogspot.nl/2016/01/the-darth-vader-chest-box-is-almost.html

Tuesday, January 26, 2016

Expanding my electronics workbench with shelves

Last week I made a electronics workbench from scaffolding wood and galvanised steel. When working with electronics you need a lot of storage space. Therefore I wanted to make shelves, preferably in the same style as the workbench. I like the workbench but the price of the galvanised clamps was steep. Luckily I found an online supplier that offers the clamps for 1/3! of the price that I paid at my local hardware store. The total price of the shelves was $30 using some scaffolding wood that was left over from the bench.

I sanded the wood thoroughly carefully removing all splinters, drilled two 28mm holes for the steel pipes in each shelf. Next I applied three successive layers of oil to the wood. I cut the steel to the desired length and assembled the clamps. Each shelf is hold in place with 28mm lock rings. I fastened the whole construction to the concrete wall. Below is some imagery of the shelves and the workbench.

The now populated electronic workbench and much needed shelves.
Finished scaffolding wood, galvanised pipes, clamps and locker rings. Time to assemble the shelves.
Top shelf with the clamp and lock ring visible.
Detail of the bottom shelf. With the socket screws it's very easy to adjust the construction.  
Finished shelves fastened to the wall.

Saturday, January 16, 2016

Homemade desk of scaffolding wood

Electronics workbench

The desk that I used as an electronics workbench is rather small. Since my electronics hobby is expanding, as hobbies tend to do, the small size of the desk became a burden. It was time for a new one. While searching on the internet I found an L-shape desk from reclaimed scaffolding wood on Etsy. The L-shape desk will fit perfectly into the corner saving a lot of room. The desk is really nice but is also very expensive (about $1500). Looking at the image I thought it is not very difficult to make even with simple tools. I was able to build it for $300 with eight planks of scaffolding wood (8" wide), three planks 2.5" wide , 6 galvanised pipes one meter length (28mm thick), four T-clamps and four supports clamps. Here are some photo's of the table and the building process.

EDIT: Later I added shelves to the workbench. Can't have too much storage space with this hobby. 

Note: I discovered that the clamps and pipes can be bought online for one third! of the price that I paid at the hardware store cutting the material cost of the workbench by half ($150).

Finished homemade desk of scaffolding wood and galvanized pipe and clamps.

Scaffolding wood sawn and sanded.

Cutting the pipes with a Dremel DSM-20.

Assembly with 2" board screw.

Using a an oil instead of a varnish. Applied with a towel to in three layers to darken and protect the wood.

L-shaped table placed in a corner of the room. I added some support to flatten the top of the table. I also flushed the screws with the surface.

Installing my tools and parts on the table and below.

Monday, January 11, 2016

The Darth Vader chest box is almost finished

Introduction

The last month I've been working on my Darth Vader chest box. I've designed and built my own circuit with the Holtek HT8950A voice modulator, I create a laser cut case and designed 3D printed parts for the chest box. Since I had to learn a lot of new techniques, e.g laser cutting and 3D printing, this is by no means an easy project for me. With the project in it's final stages now some design problems turn up that need fixing.

Soldering the board.

This week I soldered the components to the board. First I soldered the voice changer components and made sure this part of the circuit is working. Next I soldered the amplifier. I tested the total circuit and it worked the first time which is always a joyful moment. I find the Adafruit perma-protoboard very easy to work with since I'm able to copy the layout from the breadboard. Next I grouped all the buttons that operate the HT8950A on a board and soldered them to a piece perfboard. The buttons on the perfboard fit nicely into the laser cut side panel that I already made. Operating the chest box is easy with this (a major issue with my previous chest box).

Soldered perma-protoboard and breadboard side-by-side.
Close-up of the soldered board with the HT8950A voice changer chip on the right and the LM386 amplifier on the left.
Operating the voice changer with this panel should be easy.

Design issues

Last week I made 3D printed parts for the front of the chest box. Unfortunately I found that these parts didn't look good with the laser cut box. The plastic parts just didn't do justice to the laser cut plywood. I therefore decided to laser cut all the parts that sit on the from of the box with I think is aesthetically more pleasing.

Another problem arose with the female audio jack connector that I need to plug in the microphone. The thread of this 3.5mm connector just isn't long enough to be fitted onto the 6mm thick plywood. I designed a container to solve this. The audio connector fits into this container and the container is screwed to the case. Hopefully this container solves the problem.

Container for the audio jack connector created with Openscad. The container, screwed to the chest box, will keep the audio connector tightly to it's place.

Yet unsolved problems

  • I need to attach a nylon belt to the chest box. I'm thinking about popper snap fasteners attached to the belt to open or close the belt.
  • The HT8950A works fine with a proper audio signal as input but the microphone that I have, a small electret microphone, doesn't give any audible output (except for noise). I assume that the signal is to weak and therefore needs amplification.


Sunday, January 3, 2016

Designing parts for the Darth Vader chest box with OpenSCAD

Introduction

A new year, a new beginning. Last year I took a fair interest in technologies like laser cutting and 3D printing but I still relied on my old 20th century skills for my projects. I must admit that the investment in time to master these new technologies was holding me back to advance in both laser cutting and 3D printing. In the very last month of 2015 I took the decision to produce a case with a laser cutter. It was a revelation. A job that would normally take me a day or so was done in a matter of minutes with a precision that I can never achieve with the old saw and chisel. From that point on I decided to invest heavily, in both time and money, in these new technologies.

OpenSCAD

First I learned to work with Inkscape, a free 2D vector drawing program for laser cutting. I discovered that it is a good tool for illustration (e.g for web design) too. Next I needed a 3D design tool to create parts with a 3D printer. I looked at different programs such as Sketchup, 123D Design but I increasing dislike the proprietary character of these programs. Echoing the words of Richard Stallmann "the proprietary program is a system of unjust power". On the non-proprietary side there is FreeCAD and Blender but I found the learning curve of these programs too steep. Then I discovered OpenSCAD when reading an article on HackaDay. It's a free (as in free beer and free speech) program running on Windows, Linux and OSX that has a great community. Instead of using a GUI the user has to scripts his models with a simple descriptive programming language. This seems strange and cumbersome at first but it actually works for me. I found it very easy to get into. OpenSCAD is very lightweight. A GUI in CAD programs tends to be a burden on a PC and OpenSCAD lacks that GUI. Because of the script that OpenSCAD uses it is very apparent what is in the 3D model and what the dimensions are. Lastly the script is saved with the model. The comparison with HTML comes to mind. Therefore it is possible for anyone else to see how a model is made, learn from it and make changes to it. For now OpenSCAD works for me although I'm not sure what will happen if I'll try to design more complex 3D models.

Combined elements of the front of the Darth Vader chest box made in OpenSCAD. Still needs some work.


Parts for the voice changer

The Darth Vader chest box has a very distinctive look with lots of distinctive buttons and other parts (see images below). I modeled these parts with OpenSCAD beginning with the simple buttons working my way up via the coin slots to the complex rods. I'm satisfied with the result thus far. Next I'll 3D print the parts and glue them to the plywood chest box I made earlier.


Probably the most simple parts of the chest box are the buttons at the bottom of the box. Modelled in OpenSCAD.
Coin slot type of parts for the Darth Vader chest box. 
Rods for the Darth Vader chest box.