Make a Photography Light Box of cheap material (part 1: design and 3d print).
Introduction
My wife has a lot of stuff she wants to sell online and asked me to create a sturdy but cheap Photography Light Box. The dimensions of the different objects vary so I wanted to be flexible with the dimensions of the light box. We came up with a simple idea to create a three way connector that connects curtain rods. The frame will be covered with white bed sheet kept together with velcro. At the local hardware store I found plastified steel curtain rods. These were the cheapest I could find but are still very strong.
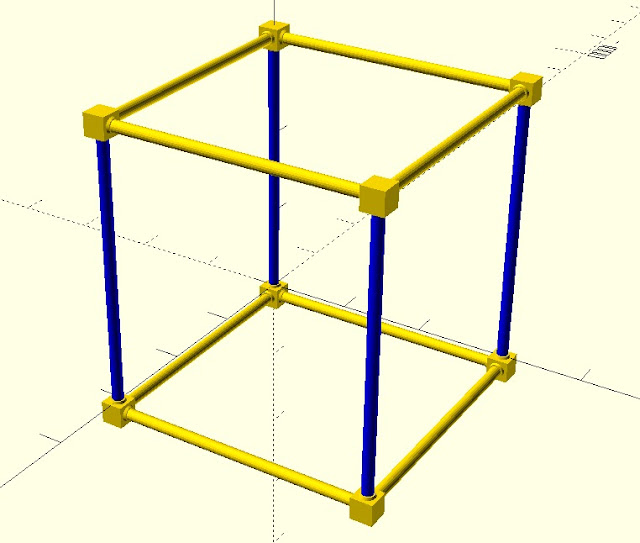
Photography Lightbox Frame modelled in OpenSCAD. The connectors are 3d printed while the rods are steel curtain rods
Creating the three way connector
I used OpenSCAD to create the three way connector and a 3d model of the light box frame. OpenSCAD is an excellent (and free) program for these symmetrical shapes. Creating the connector in OpenSCAD is therefore easy as can be seen in the timelapse video below. Creating a good 3d printed model is more difficult. The connector that I originally designed had overhang and several changes had to be made to compensate for this. Also I needed a connector that fitted firmly on the rod but could also be diassembled with ease. I therefore experimented with the connector by adding or removing part of the cylindrical shape of the connector.
Timelapse video of the first attempt to create a three way connector. Although it looked ok I had to make several changes afterwards to optimize for 3d printing and to get a better connection with the rod.
First I added a very small cylinder on either side of each larger cylinder. If the side cylinders are small enough the connector still fits into the rod but some force is needed to pull it out again. Another variant is a somewhat larger cylinder with on each side a smaller cylinder cut out (see image). Both solutions work fine I'll settle for the cut out cylinder since it looks nicer :D.
Two cadidate connectors that hopefully give a better fit into the rod. The connector in the front has is somewhat larger radius of the cylinder but two smaller cylinders are cut out. The connector in the back has a very small cylinder on either side of the larger cylinder.
Five iteration of the three way connector with the two latest in the front.
Next I'll print all connectors, cut the curtain rods to the desired size and assemble the frame. I'll leave it to my wife to finish the Photography Light Box with velcro and diffuser fabric. Want to 3D-print this yourself? All files for this project can be downloaded here.
No comments:
Post a Comment
Note: Only a member of this blog may post a comment.


No comments:
Post a Comment
Note: Only a member of this blog may post a comment.